
Sadly, Azure Bicep and ARM Templates lack a built-in option for local deployment trials, particularly when your template involves variables, parameters, functions, and outputs. To test the functionality of certain functions or data structures, deploying them in Azure is still necessary. This challenge persists, meaning each time you wish to experiment with just your variables and outputs, initiating a deployment via AZ_CLI or PowerShell is required to observe the outcomes.
However, the Bicep team has been working on a new feature that will make this process much more straightforward. The new feature, known as the "Deployment Pane," is currently in preview and available in VSCode. This feature allows you to deploy your Bicep files quickly and easily, without the need to use the Azure CLI or PowerShell.
💥 How to Use the Bicep Deployment Pane?
To use the Bicep Deployment Pane, you must first install the Bicep extension in VSCode. Once installed, you can open the Bicep file you want to deploy and click on the "Deploy" button in the top right corner of the editor. This will open the Deployment Pane, where you can select the scope of your deployment and click some options to deploy or validate your Bicep file.
Let's take a look at the Deployment Pane's features and how to use them.
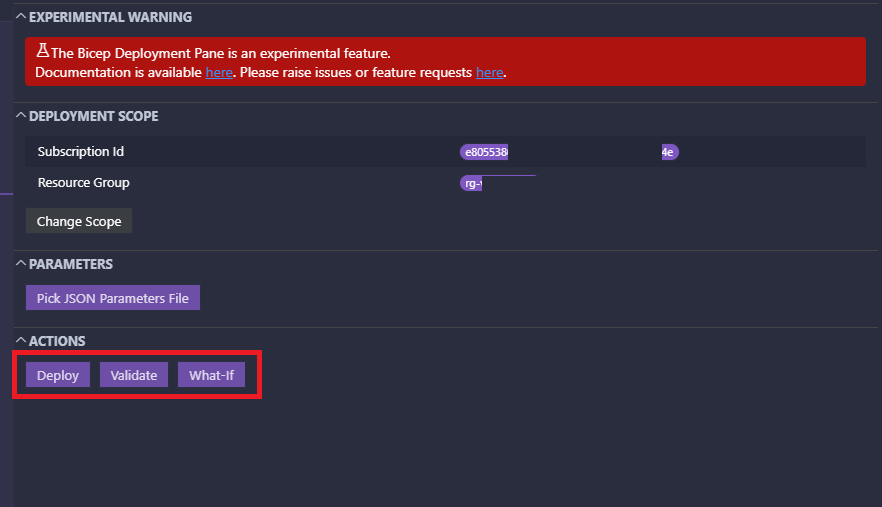
Deployment Scope
- Subscription : Select the subscription where you want to deploy your Bicep file.
- Resource Group : Resource group where we want to make scope of deployment.
Deployment Options
- Deploy : Deploy the Bicep file to the selected subscription and resource group.
- Validate : Validate the Bicep file without deploying it.
- What-If : Preview the changes that would be made by the Bicep file without deploying it.
🚀 Template for playing with variables and outputs
I had to create a simple Bicep file to test the Deployment Pane. The file contains a few variables and outputs to see how the Deployment Pane works. Here's the Bicep file I used:
targetScope = 'resourceGroup'

var resourceGroups = {

  'rg-01'    : {

    name     : 'connectivity-hub-uksouth'
    location : 'eastus'

  }
  'rg-02'    : {

    name     : 'connectivity-hub-ukwest'
    location : 'westus'

  }

}

output resourceGroups array = [for (rgName, rgDetails) in items(resourceGroups) : {

  key      : rgName.key
  name     : rgName.value.name
  location : rgName.value.location

}]
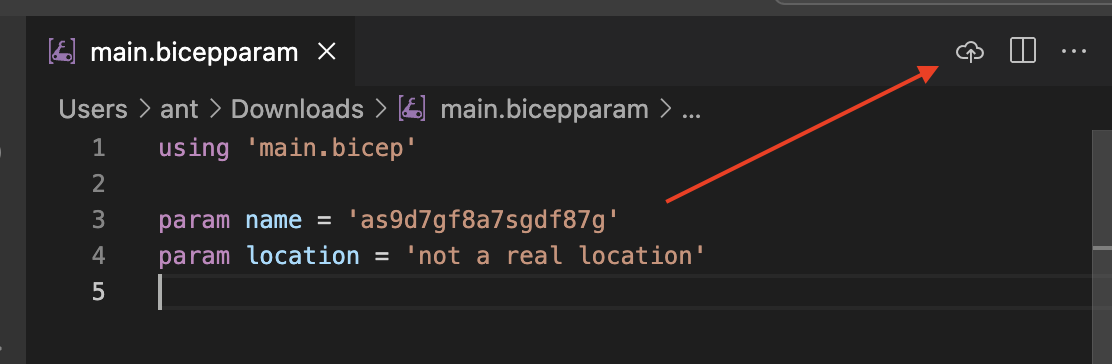
If you already installed the Bicep extension in VSCode, you can open a .bicep or .bicepparam file in your editor. Press the Deployment Pane button visible in the top right of your editor window.
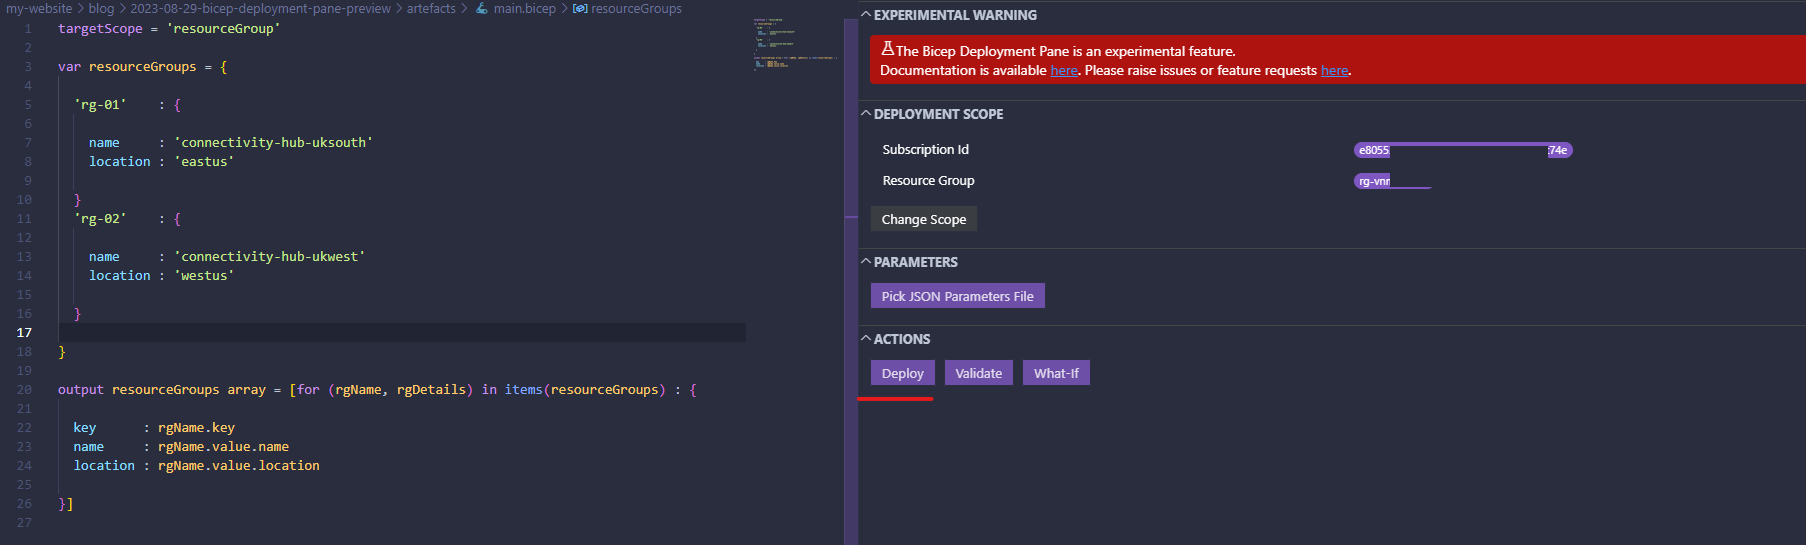
👀 Deployment Pane in Action
In my example Bicep file, open it in VSCode and click on the Show Deployment Pane button. You will see the Deployment Pane on the right side of your editor. Then we can start to hit Deploy button to see the results quickly.
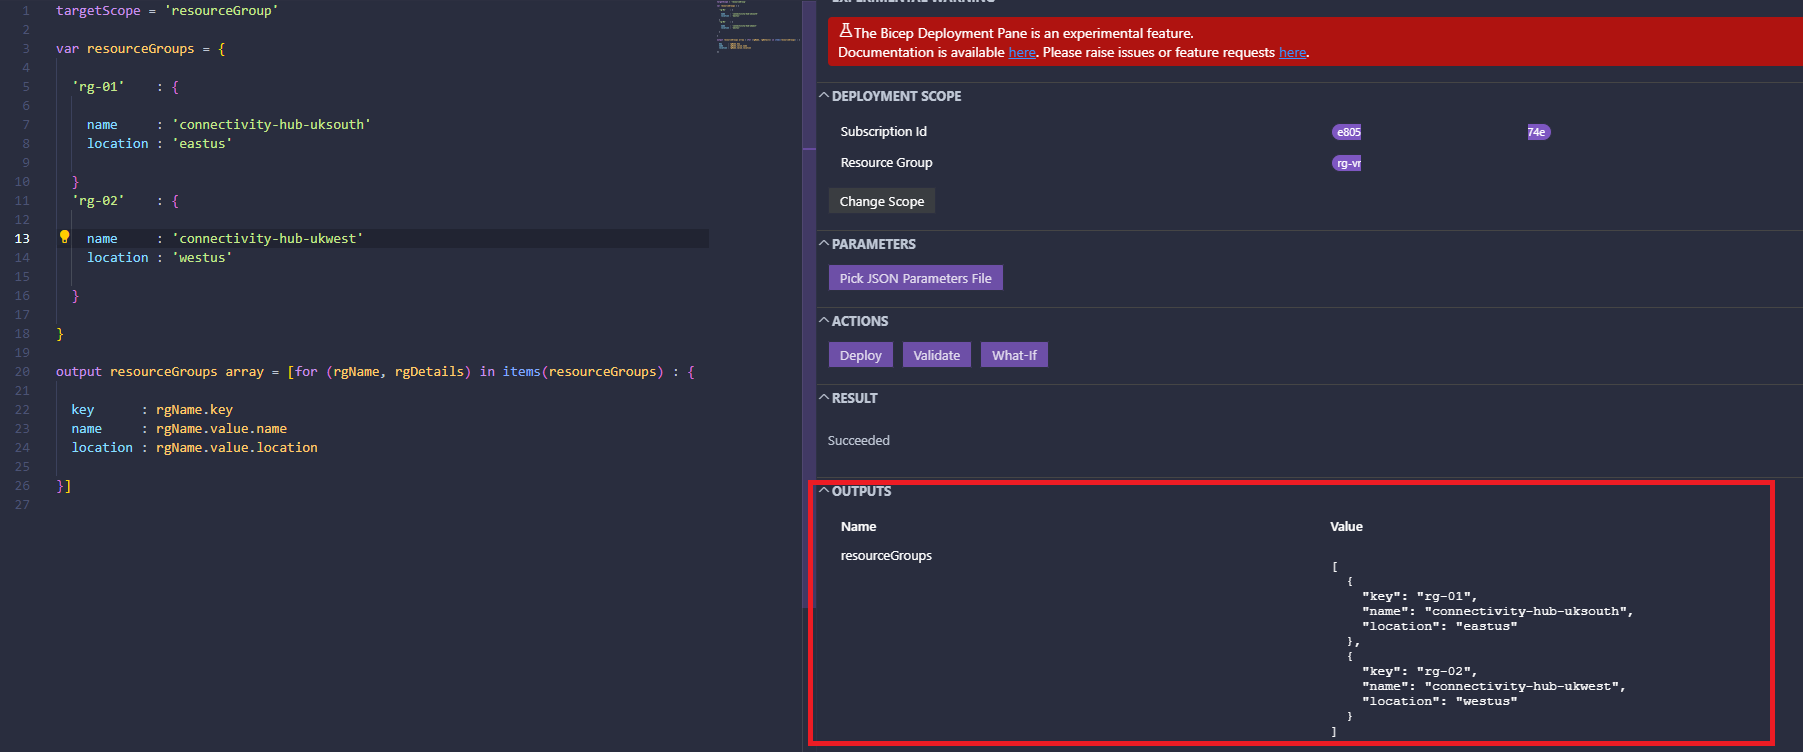
After hitting the Deploy button, you will see the deployment process in the Deployment Pane. Once the deployment is complete, you will see the outputs of the deployment in the Deployment Pane.
I'm confident that over time, the Bicep team will keep enhancing the Deployment Pane feature. While it might not revolutionize the entire process, it's undoubtedly a valuable tool for Bicep developers. Thanks for reading through, please feel free to reach out to me.