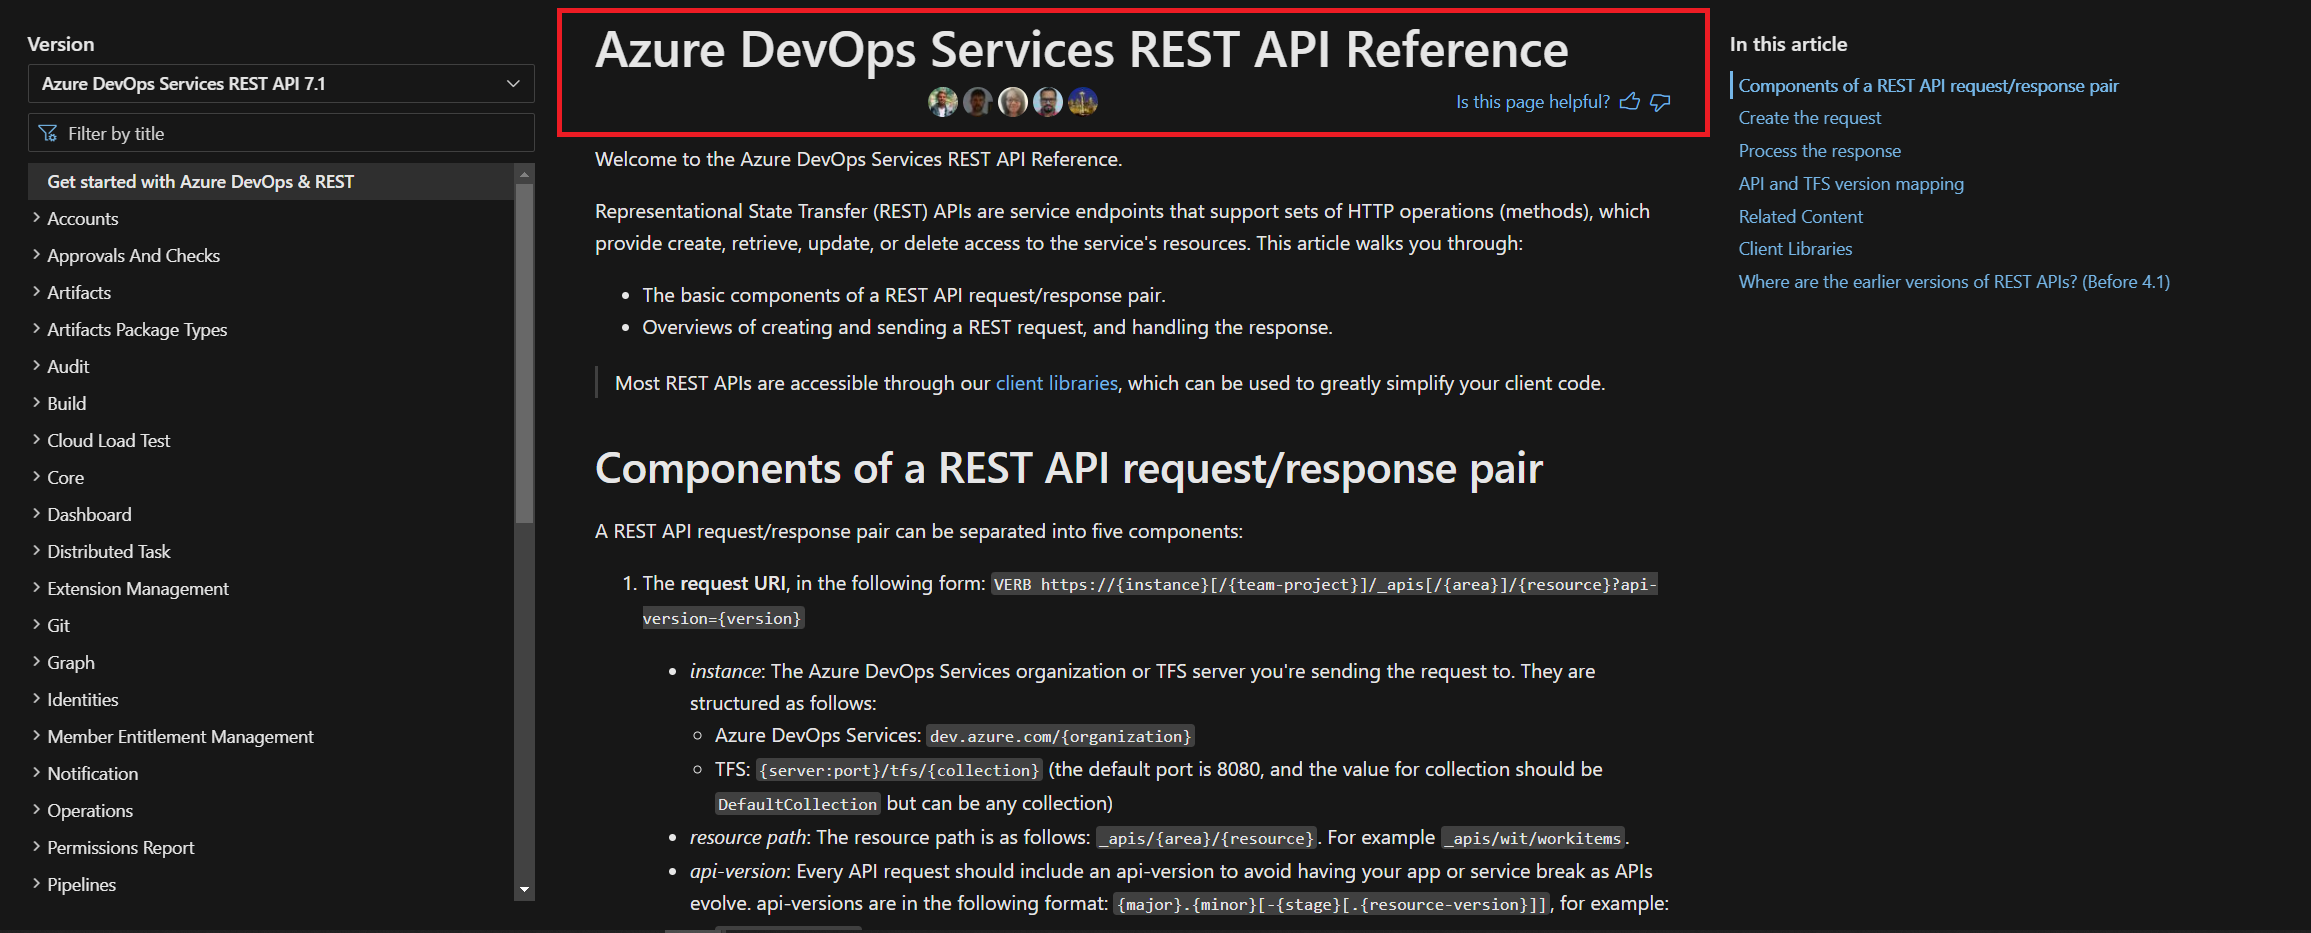
In this article series, we will focus on how and why Azure DevOps API can be usable with Powershell with emphasizing critical details in the latter parts. Before heading to the article, it is vital to notice that this article series requires a solid understanding of REST API. With the REST API's page down below, you can access all the endpoints and create requests with necessary methods such as GET, POST, PATCH
AzDo Rest API Documentation
If you have a strong background in Azure DevOps, there is no doubt that you've already come across the term 'Organization.' There are two different methods when it comes to authentication with Powershell. In order to access the Azure DevOps organization, we can use the Azure Active Directory service or Personal Access Token (PAT). In this article series, we will only use the Personal Access Token.
Personal Access Token
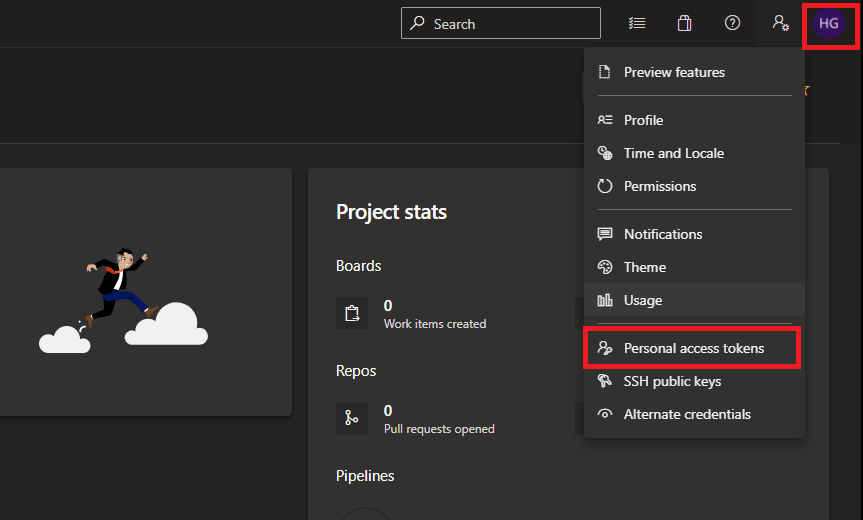
As is shown above, in the Personal Access Tokens section, you can configure your PAT by authorizing the scope of access. In this article, we will create our token with Full Acccess
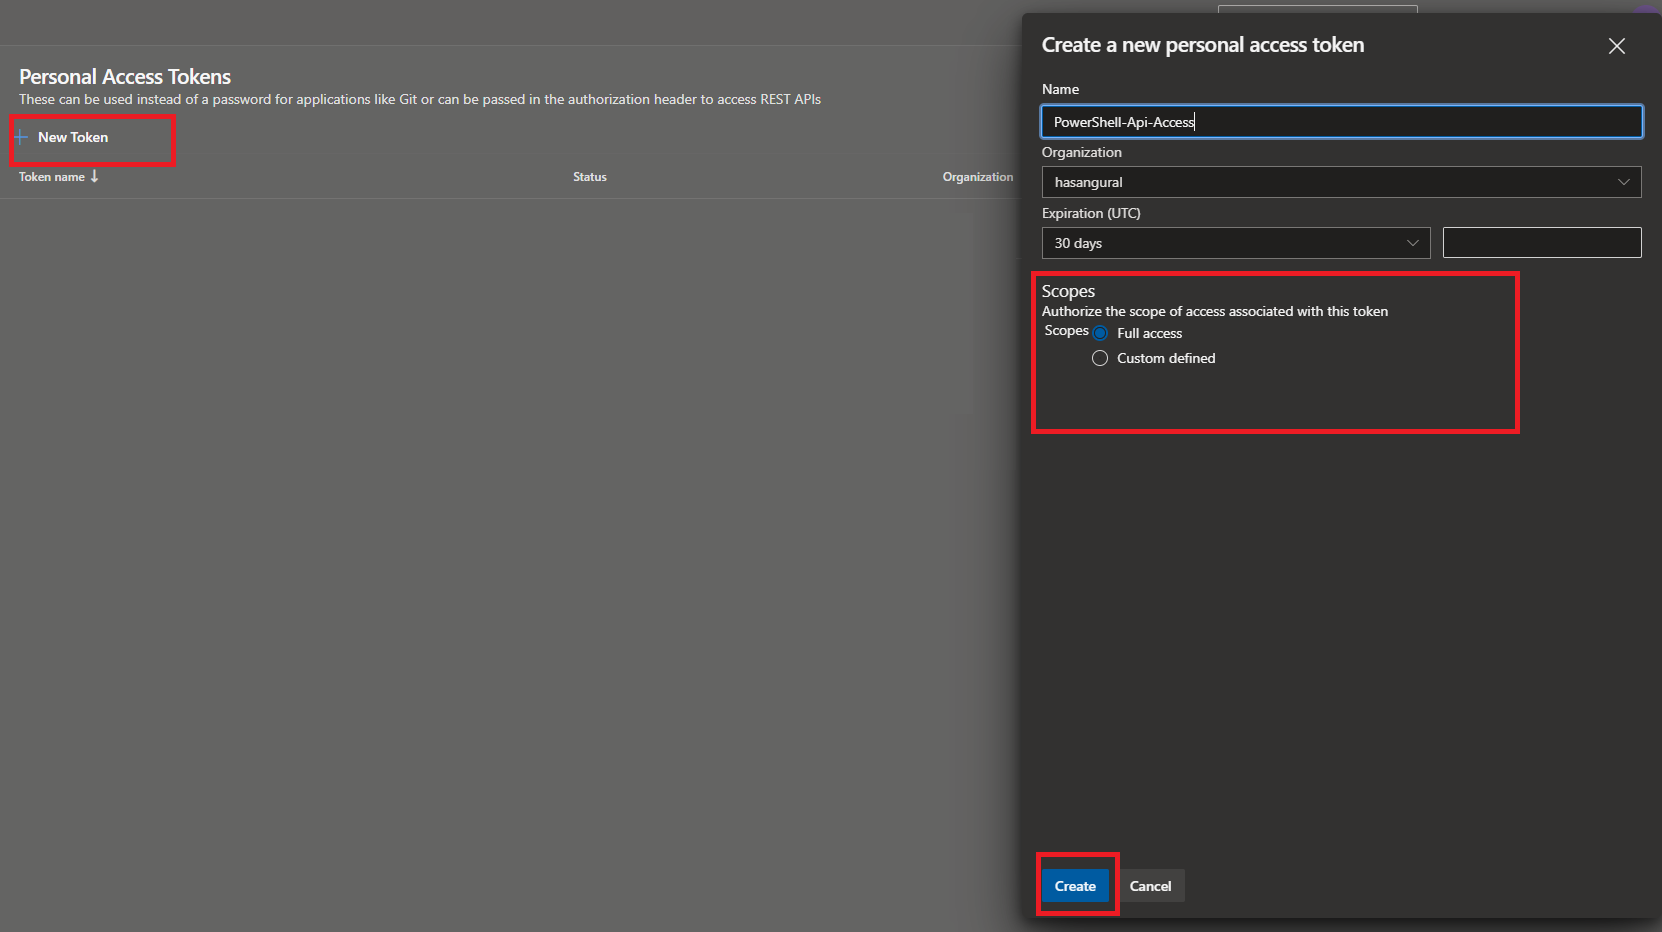
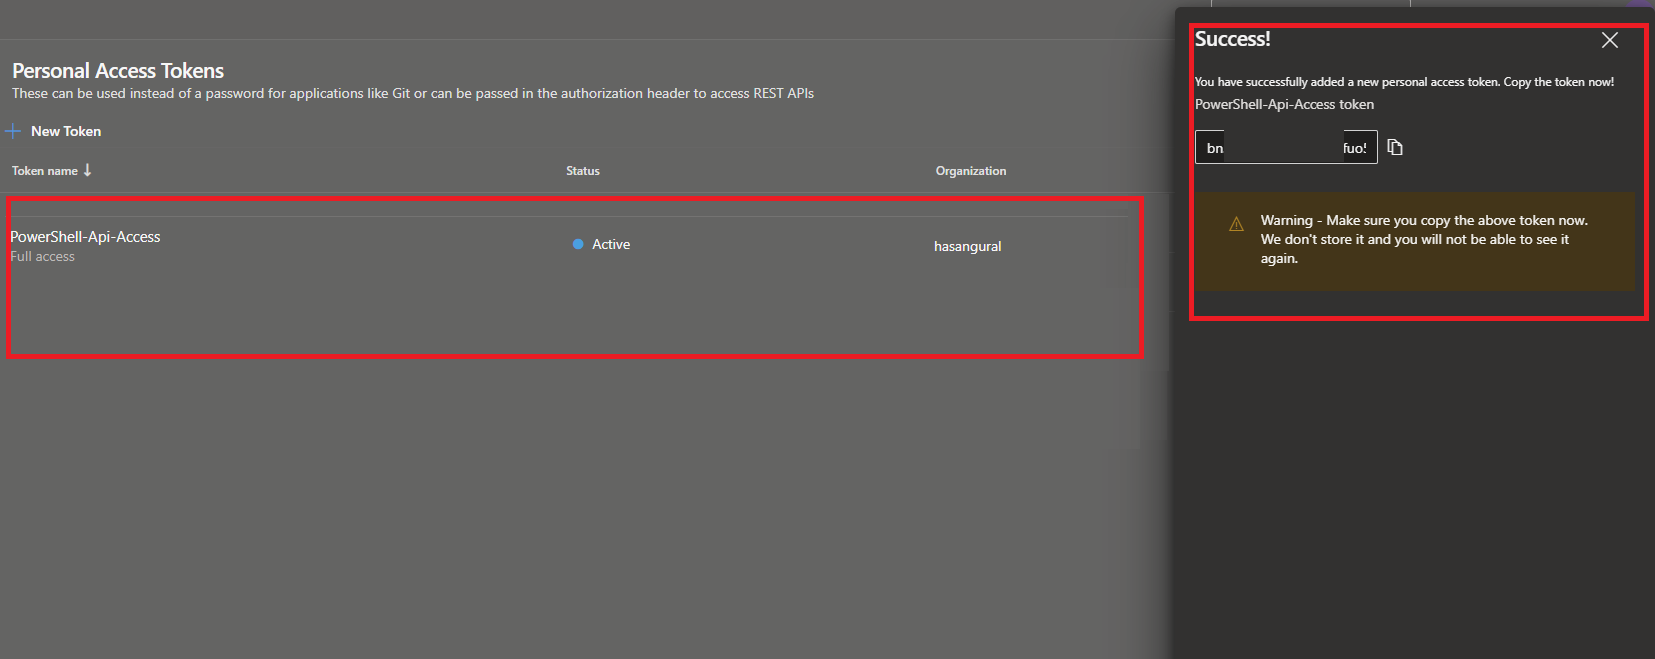
After clicking on the Create button in the Personal Access Tokens section, we get a token ready to be used within PowerShell. As we completed the process of creating a PAT, now we can jump into the part where we will use PowerShell for Azure DevOps REST API.
Let's open a device that supports PowerShell 3.0 or more and start our operations!
I am going to be attentive to demonstrate images over VSCode. If you do not use PowerShell on VSCode, I highly suggest using it. You can find the necessary information on how to compile PowerShell on VSCode in my blog. We are going to execute requests by using Invoke-RestMethod cmdlets.
PowerShell Expressions
Our first steps will be about creating a bunch of PowerShell variables first. Let's try to understand the lines below.

$OrganizationName = "hasangural" # Azure DevOps OrganizationName
$AzDoToken        = "PAT-TOKEN-HERE" # Azure DevOps Personal Access Token (PAT)

# Authentcation Header for AzDo REST Endpoint.
$AuthenicationHeader = @{Authorization = 'Basic ' + [System.Convert]::ToBase64String([System.Text.Encoding]::UTF8.GetBytes(":$AzDoToken")) }

# Generating environment variables

Set-Variable -Name "azDoAuthHeader" -Value $AuthenicationHeader -Scope Global -ErrorAction Stop
Set-Variable -Name "azDoBaseUrl" -Value "https://dev.azure.com/$OrganizationName" -Scope Global -ErrorAction Stop
It is crucial to understand these codes line by line. As you can see, we created variables named OrganizationName and AzDoToken, assigned their values accordingly. After that, we created another variable named AuthenicationHeader and set it to Personal Access Token with Basic Authorization type as a hash table. What we did next was to create two environment variables. Our first environment variable is azDoAuthHeader. We assigned it to the encoded token value. We declared our second variable,azDoBaseUrl, to call it when we execute REST requests.
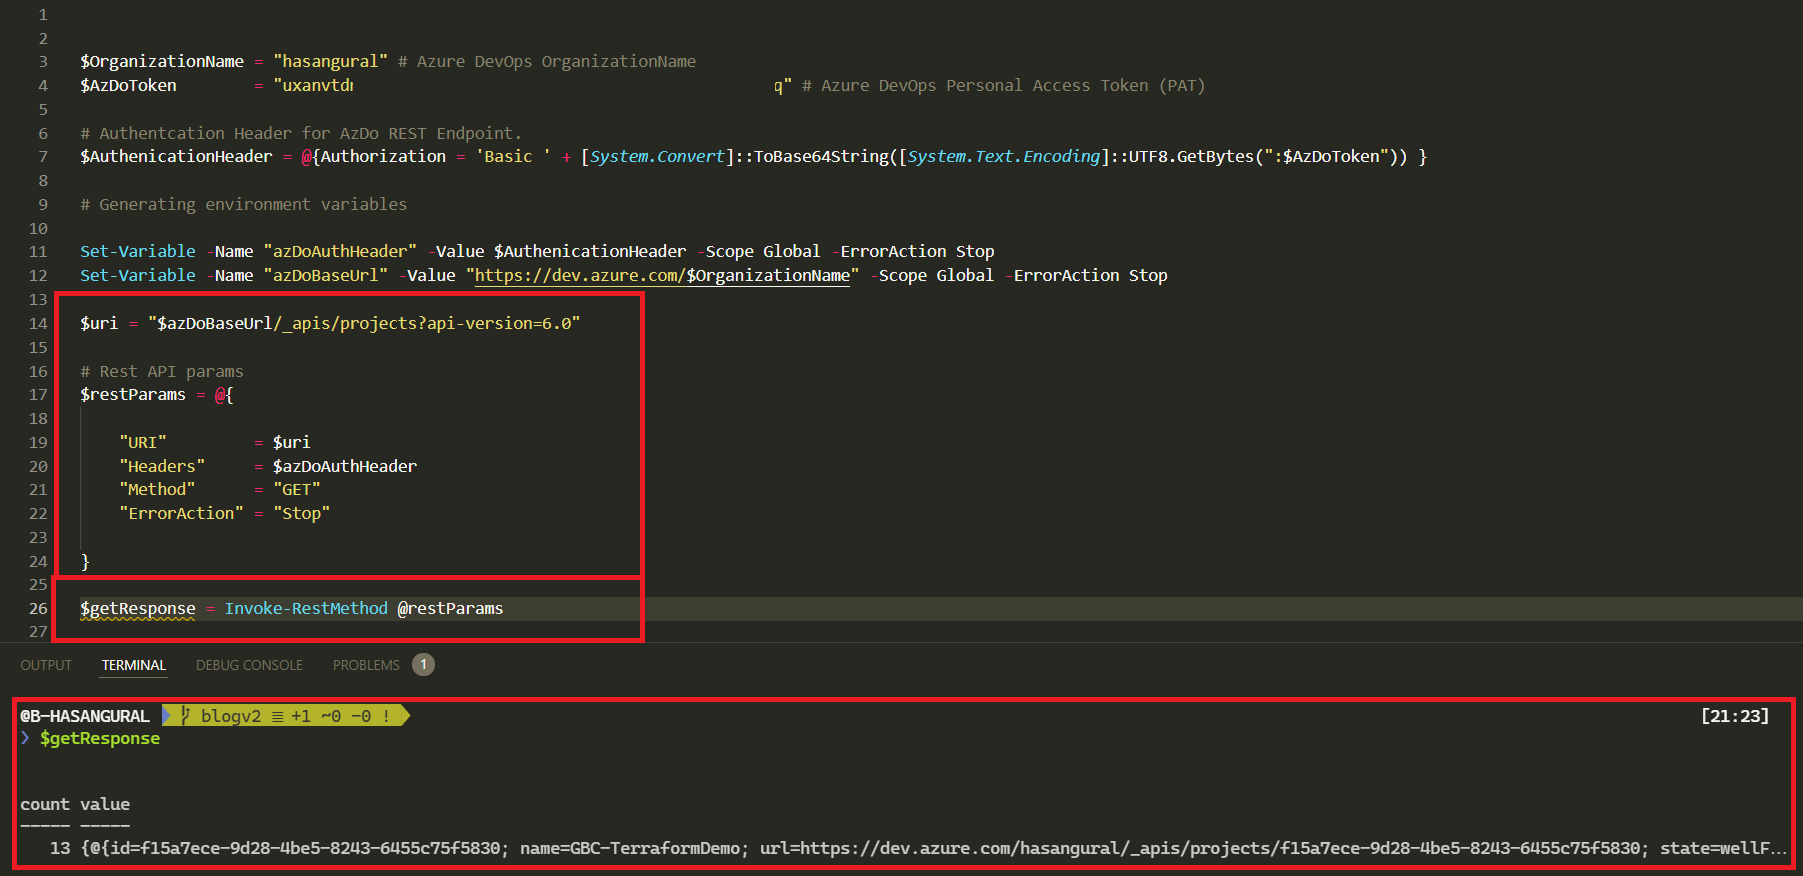
We executed our code to declare variables completely on PowerShell for the authentication process. Now, we can create a basic REST request. Lets do a basic example with the images down below.
✔️ Lets display the list of all projects in an Azure DevOps organization.
$OrganizationName = "hasangural" # Azure DevOps OrganizationName
$AzDoToken        = "PAT-TOKEN-HERE" # Azure DevOps Personal Access Token (PAT)

# Authentcation Header for AzDo REST Endpoint.
$AuthenicationHeader = @{Authorization = 'Basic ' + [System.Convert]::ToBase64String([System.Text.Encoding]::UTF8.GetBytes(":$AzDoToken")) }

# Generating environment variables

Set-Variable -Name "azDoAuthHeader" -Value $AuthenicationHeader -Scope Global -ErrorAction Stop
Set-Variable -Name "azDoBaseUrl" -Value "https://dev.azure.com/$OrganizationName" -Scope Global -ErrorAction Stop

# base address
$uri = "$azDoBaseUrl/_apis/projects?api-version=6.0"

# Rest API params
$restParams = @{

    "URI"         = $uri
    "Headers"     = $azDoAuthHeader
    "Method"      = "GET"
    "ErrorAction" = "Stop"

}

$getResponse = Invoke-RestMethod @restParams
As you can see in the picture above, we accessed all the projects in our Azure DevOps organization with a basic query. This is a good sign for us that indicates everything works very well. In our next article, we will try to understand automation with specific examples.